

Cladding Edge Board Installation
How to install edge boards for your Hyperion® composite cladding
Installing edge boards for doors and windows
Hyperion Edge Board can be used to create a flush finish for corners, doors and window frames. This option can use hidden fasteners for no visible surface screws.
Step 1
Edge Boards must be installed before cladding boards when used around corners, doors and windows.
Step 2

For this finish you must ensure that you double batten the area around the window frame or corners.
Step 3

Cut the Edge Board to size for the corner. If placed in a window frame or door, mitre the end down to meet the end of a perpendicular board.
- Ensure the battening finishes 21mm away from the window edge to allow for the thickness of the Edge Board (21mm).
Step 4
If you do not want visible screws, you can use hidden starter fasteners to hold the board in place.
- Fix starter fasteners every 480mm along the batten of the corner or windowsill, so they can hold the inner edge of the Edge Board.
- Push the Edge Board into the starter fasteners.
Step 5

If you are not using hidden fasteners, pre-drill and screw directly through the board front or inner groove max. every 400mm.
Step 6

Fix the outer Edge Board by drilling at an angle through the nose of the board at a 45° angle into the substructure. We recommend securing the board every 400mm along the length of the joist.
- Ensure to pre-drill a hole before screwing.
Step 7
Repeat until the window frame is covered.
Step 8

Install the cladding boards to create a flush finish.
- You may be required to adjust the screw position slightly to avoid the cladding board back.
Installing edge boards on corners
To cover a corner of wall with the Edge Board, that is to be cladded on both sides, you must add an additional batten on the corner.
- The Edge Board must be installed before installing cladding boards.
- Ensure you leave an expansion gap of 6mm when butt joining Edge Boards.
Edge boards on internal corners
Internal corners do not need a corner trim or edge board.
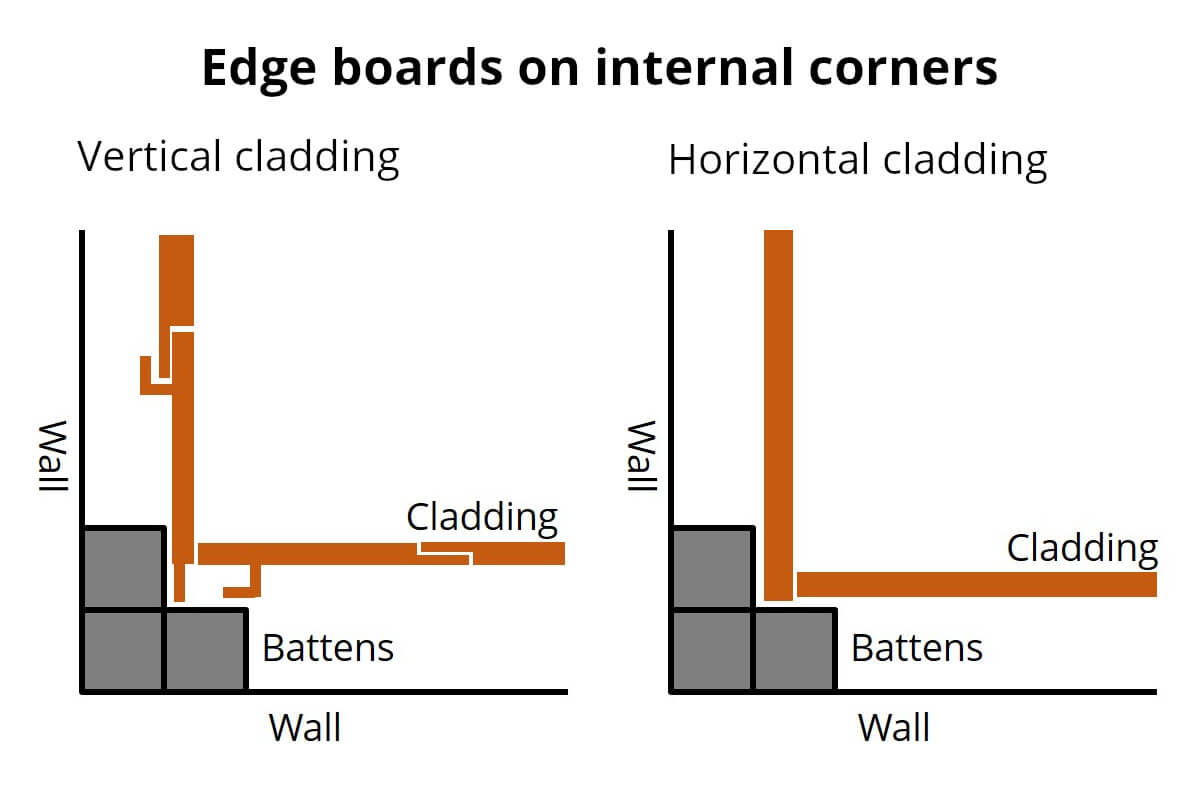
Place one board in the internal corner with the grooved end facing the wall and drill it down. Place the second corner board next to it as shown, drilling it into the batten behind. Remember to leave an expansion gap between the cladding boards.


